
Idli is a classic South Indian breakfast dish prepared from a fermented batter of rice and urad dal (hulled black gram), steamed into soft, airy, and spongy cakes. It is commonly enjoyed with Coconut Chutney and Sambar, making for a nutritious and satisfying meal. It is one of thehealthiest and popular breakfast. Here I share my foolproof recipe with video and step-by-step photos that will help you in making the best idli. This Idli recipe is one of the earliest recipe from the blog which has been tried and tested with great results by many of our readers.
Soft Idli Made the Traditional Way
Idli isn’t just food — it’s a memory. Growing up, Sundays at home meant the comforting rhythm of idli-making. My mom would soak rice and urad dal during the day, and by night, the familiar whirr of our old Sumeet mixer would fill the kitchen as she ground the batter.
I still remember that earthy aroma of freshly ground urad dal — so distinct, so comforting. Even today, when I prepare the batter, I’m instantly transported back to those evenings, watching her pour the thick batter into a large bowl, gently mixing in salt, and setting it aside to ferment overnight.
Sunday breakfast was always a celebration of soft, steaming hot idlis; sometimes followed by crisp dosas from the same batter. Any leftovers would magically turn into delicious uttapams or paniyarams the next day.
It was simple, soulful food made with love; a rhythm I continue in my own kitchen today. Along with those memories, this recipe brings together time-tested technique and careful fermentation so your idlis turn out soft and fluffy every time.
Idli is my comfort food – simple, nourishing, and timeless. Naturally vegan, gluten-free, and light on the stomach, it’s also one of the healthiest breakfast options around. This classic South Indian dish has found fans not just across India, but around the world.
Idli is a soft, steamed savory cake made from a naturally fermented batter of parboiled rice and urad dal (hulled black gram). It’s a staple South Indian breakfast known for being light, nutritious, vegan, and gluten-free.
The process involves soaking rice, fenugreek seeds and lentils, grinding them into a fine, thick batter, fermenting it overnight or for 8 to 9 hours, and then steaming the batter in idli moulds. The result is a fluffy, spongy, and mildly tangy idli that pairs beautifully with coconut chutney and sambar.
This post walks you through the traditional way of making idli with rice – so you can recreate the same soft idlis I grew up eating.
Overview of the Idli Making Process
Making idli the traditional way involves four key steps: soaking, grinding, fermenting, and steaming. While there are shortcuts available today, nothing quite matches the soft texture and light tang of a properly fermented homemade batter.
There are two time-tested approaches: one using idli rice, and the other using idli rava. Both yield excellent results and follow the same foundational method.
1. Idli with Rice and Urad Dal
This classic version uses idli rice paired with hulled urad dal (black gram). Idli rice refers to parboiled rice, traditionally used in making soft idlis.
You can use either whole or split urad dal. Both work well as long as they’re fresh. Aged lentils don’t ferment properly and can lead to dense idlis.
Some home cooks use short-grain varieties of raw rice like parmal rice or sona masuri rice, which also give a soft texture. The batter is ground to a fine consistency and mixed with salt before fermenting.
2. Idli with Idli Rava
A slightly easier method uses idli rava, which is coarsely ground parboiled rice. It skips the rice grinding step, making it quicker while still producing soft, fluffy idlis. Just soak the rava and urad dal separately, then grind only the dal before mixing and fermenting.
Soaking, Grinding & Fermentation Tips
Each stage plays a role in getting perfect idlis — soft, spongy, and light.
1. Soaking Tips
Rinse both rice and dal well and soak separately for 4 to 5 hours. Use fresh urad dal for best fermentation. Poor-quality or aged dal often results in chewy, flat idlis.
2. Grinding Methods
a) Stone Grinder: Ideal for large batches. Produces fluffier batter with better fermentation. Add water gradually — around 1 cup for ½ cup urad dal and 1.5 to 2 cups for 2 cups soaked rice.
b) Mixer Grinder (Mixie): Perfect for small batches. A good mixie or high-speed blender like Vitamix does the job well with careful technique.
Personally, I sometimes use the stone grinder for larger quantities and the mixie for everyday batches. Both methods work wonderfully when you use the correct ratios and allow proper fermentation time.
3. Fermenting the Batter
Once ground, mix the rice and dal batters thoroughly. Cover and leave to ferment for 8 to 12 hours or overnight in a warm place. A well-fermented batter will double (or even triple) in volume and have a mildly sour aroma – perfect for idli.
The fermentation of idli batter happens naturally due to wild yeast and lactic acid bacteria present on the rice and urad dal. As they multiply, they release gases and acids that help the batter rise, giving idlis their signature soft and spongy texture.
4. Steaming the Perfect Idlis
Idlis are steamed in greased idli moulds placed in a steamer or pressure cooker (without the weight/whistle). Spoon the batter into moulds and steam until set.
The idlis should be steamed for 12 to 15 minutes; avoid over-steaming as it can make them dry or dense. To check doneness, insert a toothpick — it should come out clean.
Step-by-Step Guide
How to Prepare Traditional Idli at Home
Soak the Rice, Lentils & Poha
1. In a bowl or pan take 1 cup parboiled rice and 1 cup regular rice. Here I have used the Indian variety of sona masuri rice along with parboiled rice.
Instead of this proportion, you can also use overall 2 cups of idli rice OR 2 cups of parboiled rice (as shown in the video above).
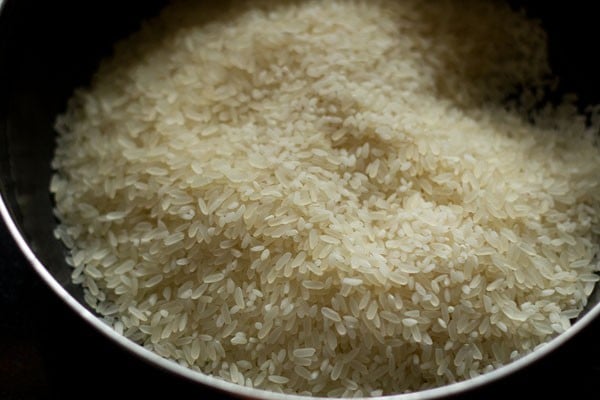
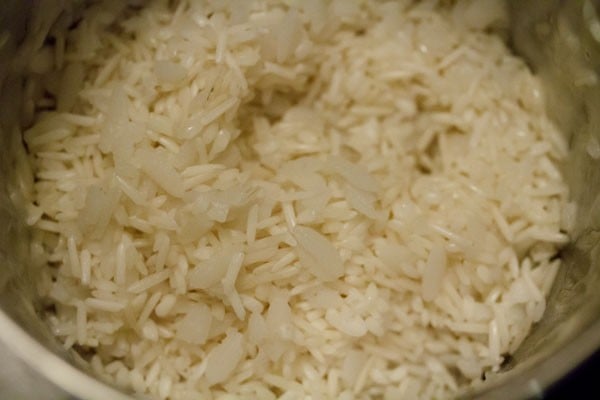
2. Pick and then rinse both the rice varieties a couple of times in fresh water. Drain all the water and keep it aside.

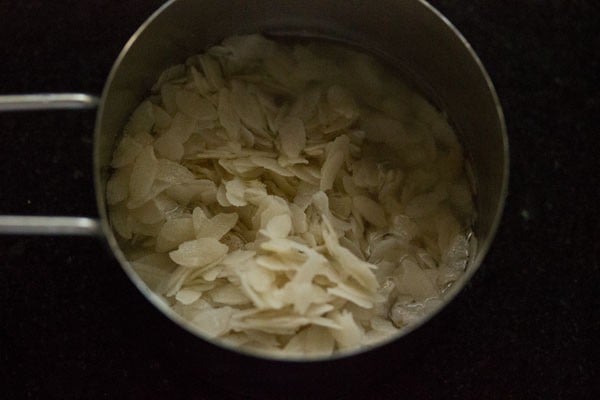
3. Take ¼ cup thick poha (flattened rice or parched rice) in a bowl. Poha helps in making the idli soft and fluffy. If you don’t have poha then you can skip it.

4. Rinse the poha once or twice with fresh water.
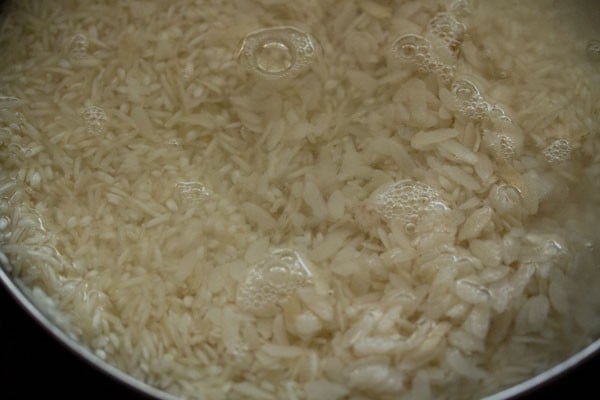
5. Then add the poha to the rice. Add 2 cups of water. Mix very well and keep aside covered to soak for 4 to 5 hours.
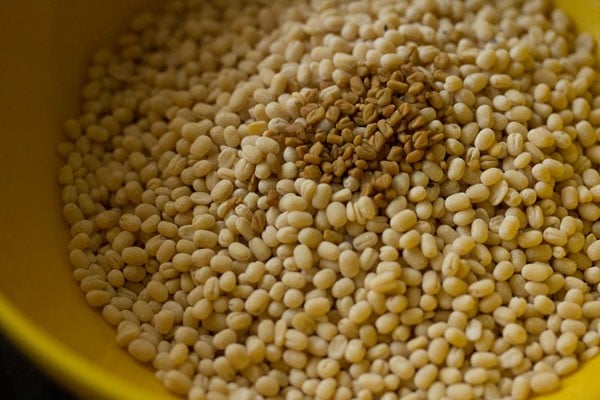
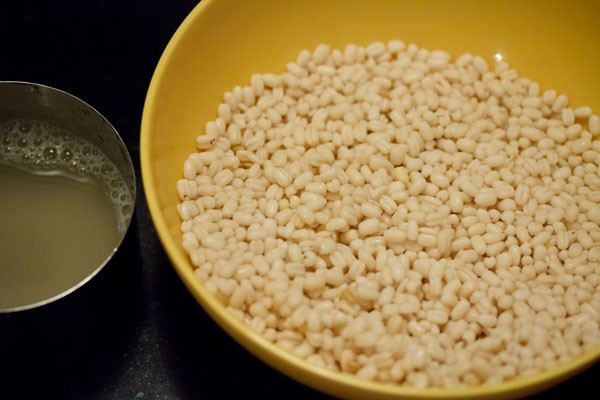
6. In a separate bowl take ½ cup urad dal (husked black gram) along with ¼ teaspoon fenugreek seeds.
Omit the fenugreek seeds if you don’t have them.
7. Rinse a couple of times in fresh water.
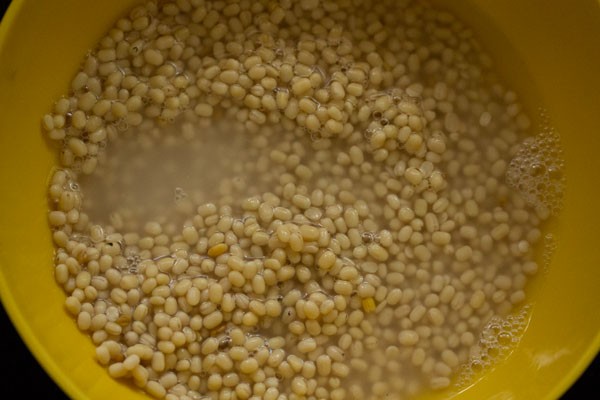
8. Add 1 cup water. Cover and soak for 4 to 5 hours.
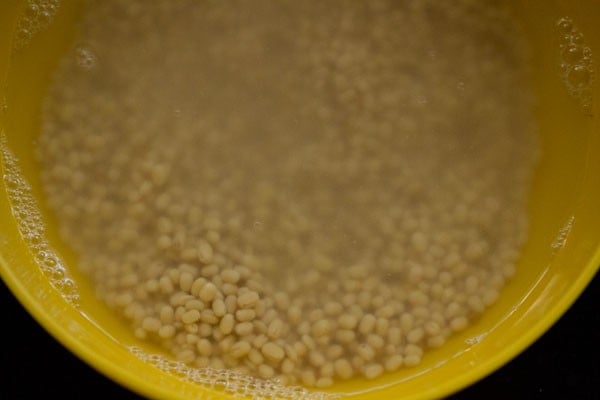
9. Before grinding, drain the water from urad dal, but don’t throw away the water. Reserve the soaked water as we will be using this water for grinding or you can use fresh water for grinding.
Grind Rice and Urad Dal Separately
10. In a wet grinder jar, add the urad dal. Initially add ¼ cup of the reserved water or fresh water.

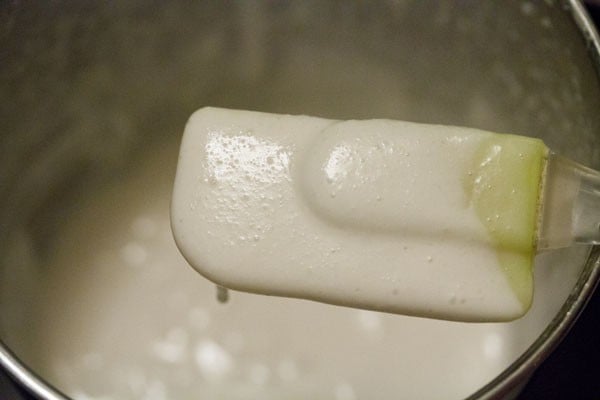
11. And grind the urad dal for some seconds. Then add ¼ cup of the reserved soaked water or fresh water and continue to grind. The batter should be light and fluffy when completely ground.
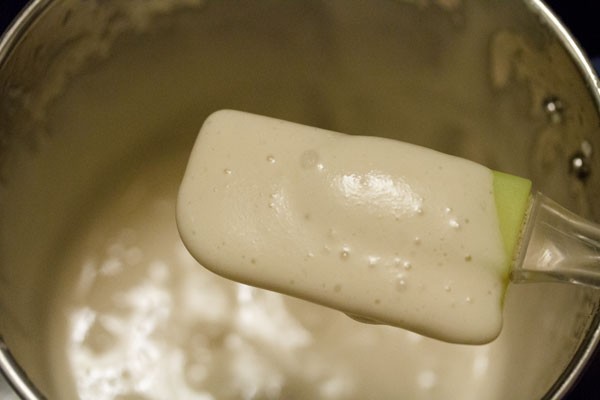
12: Pour the urad dal batter in a deep pan or bowl.
13: Drain the water from the rice and poha. Add them in the wet grinder jar or in a powerful blender. I usually grind in two batches.
Depending on the capacity of your mixer-grinder or blender you can grind in two to three batches. If the mixie gets heated up while grinding, then stop and let it cool. Then continue with the grinding.
14: Use the reserved urad dal strained water or regular fresh water to grind the rice and poha too. Add water in parts and grind.
The rice can have a fine rava like consistency in the batter. A smooth batter is also fine. I usually add a total of ¾ cup of water while grinding rice. The rice batter should not be too thick or thin.
You can add about ¾ to 1 cup of water depending upon the quality of rice.
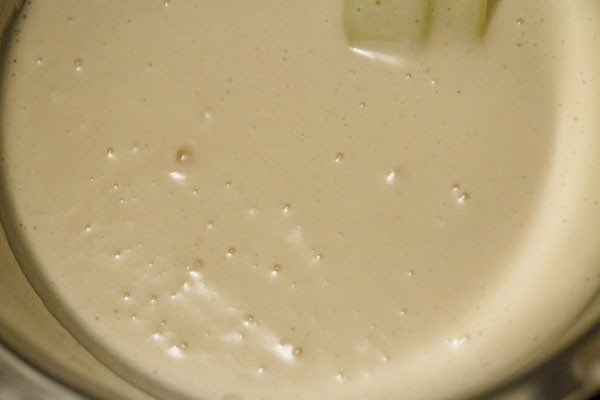
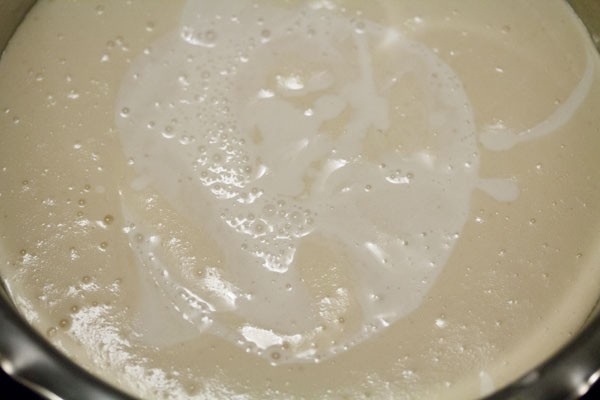
15: Now pour the rice batter in the bowl containing the urad dal batter.
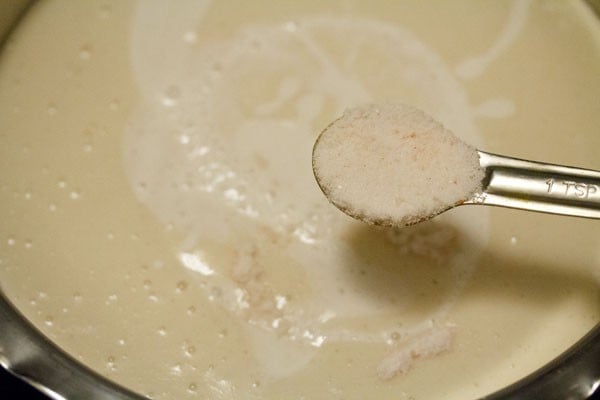
16. Add 1 teaspoon of edible rock salt or pink salt. Mix very well with a spoon or spatula. If you live in a cool or cold region, then do not add salt. Add salt later once the fermentation is done.
If you live in a hot or warm climate, then add salt as it does not allow the batter to get over fermented in the time duration of 6 to 8 hours.
Note that salt retards the fermentation process.
Let the Batter Ferment Naturally
17. Cover the bowl or container with a lid and keep the batter in a warm place. It should be left undisturbed for 8 to 9 hours. Don’t use an air-tight lid. In colder climate, keep the batter for a longer time – from 12 to 24 hours.
I have mentioned various tips below for the idli batter to ferment well. So do read this section below after step by step photos.
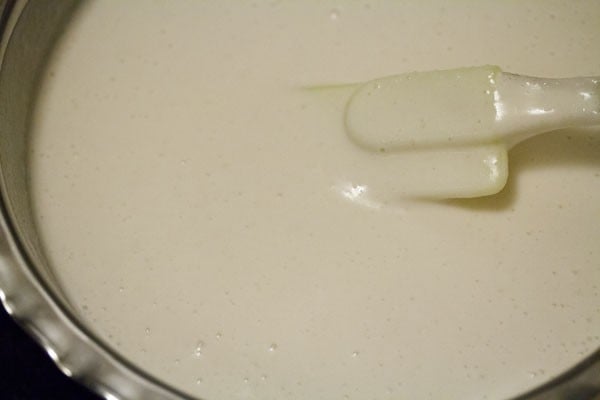
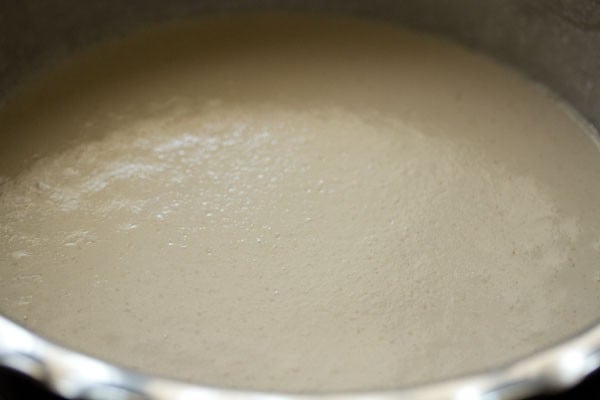
18. The batter the next morning. It will ferment and increase in volume. A well fermented idli batter will have a nice sour aroma with many tiny air pockets in the batter.
As soon as the batter is fermented you can begin with steaming the idli or keep the batter in the fridge if making later.
If you allow the fermented batter to remain at room temperature, it will ferment more and will become very sour with time.
Steam the Idli to Perfection
19. Grease or brush the idli mould with oil all over evenly. Gently and lightly swirl the batter. Don’t overdo. Now with a spoon pour portions of the batter in the greased idli moulds.
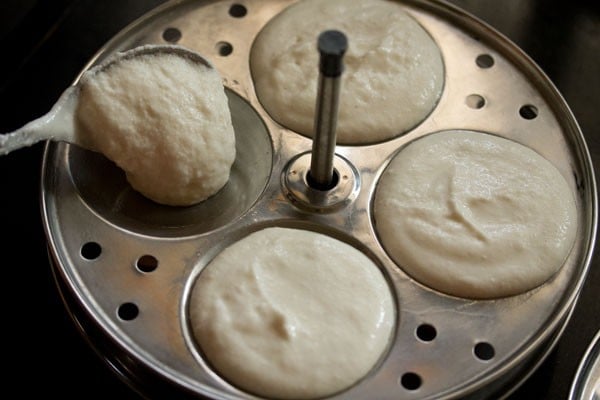
20. Take your idli steamer or pressure cooker or electric cooker or Instant pot. Add some 2 to 2.5 cups water and heat the water until it comes to a light boil. Keep the idli mould in the steamer or pressure cooker. Steam for 12 to 15 minutes.
Timing will vary depending on the kind of equipment you have used. If using a pressure cooker, then cover the pressure cooker with its lid. Remove the vent weight/whistle from the lid. Steam the idlis for approx 12 to 15 minutes.
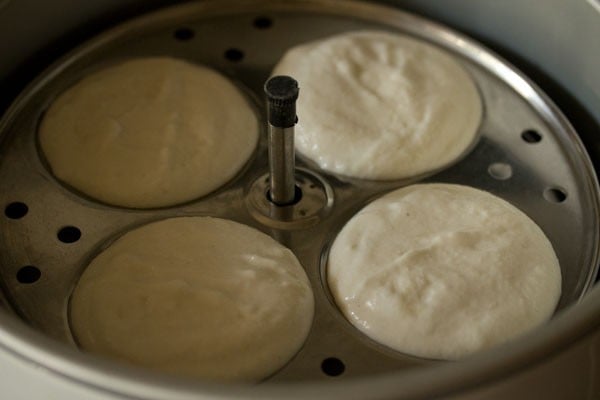
21. Check for doneness by carefully inserting a bamboo skewer or knife. If it does not come out clean, then keep again for a few more minutes.
When done remove the idli mould from the cooker. Don’t overcook as then they become dry.
Dip a spoon or butter knife in water and slid them through the idlis. Remove and place the idlis in a warm container like a casserole.
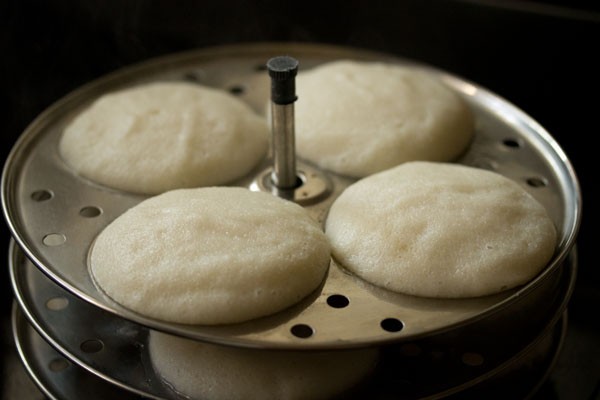
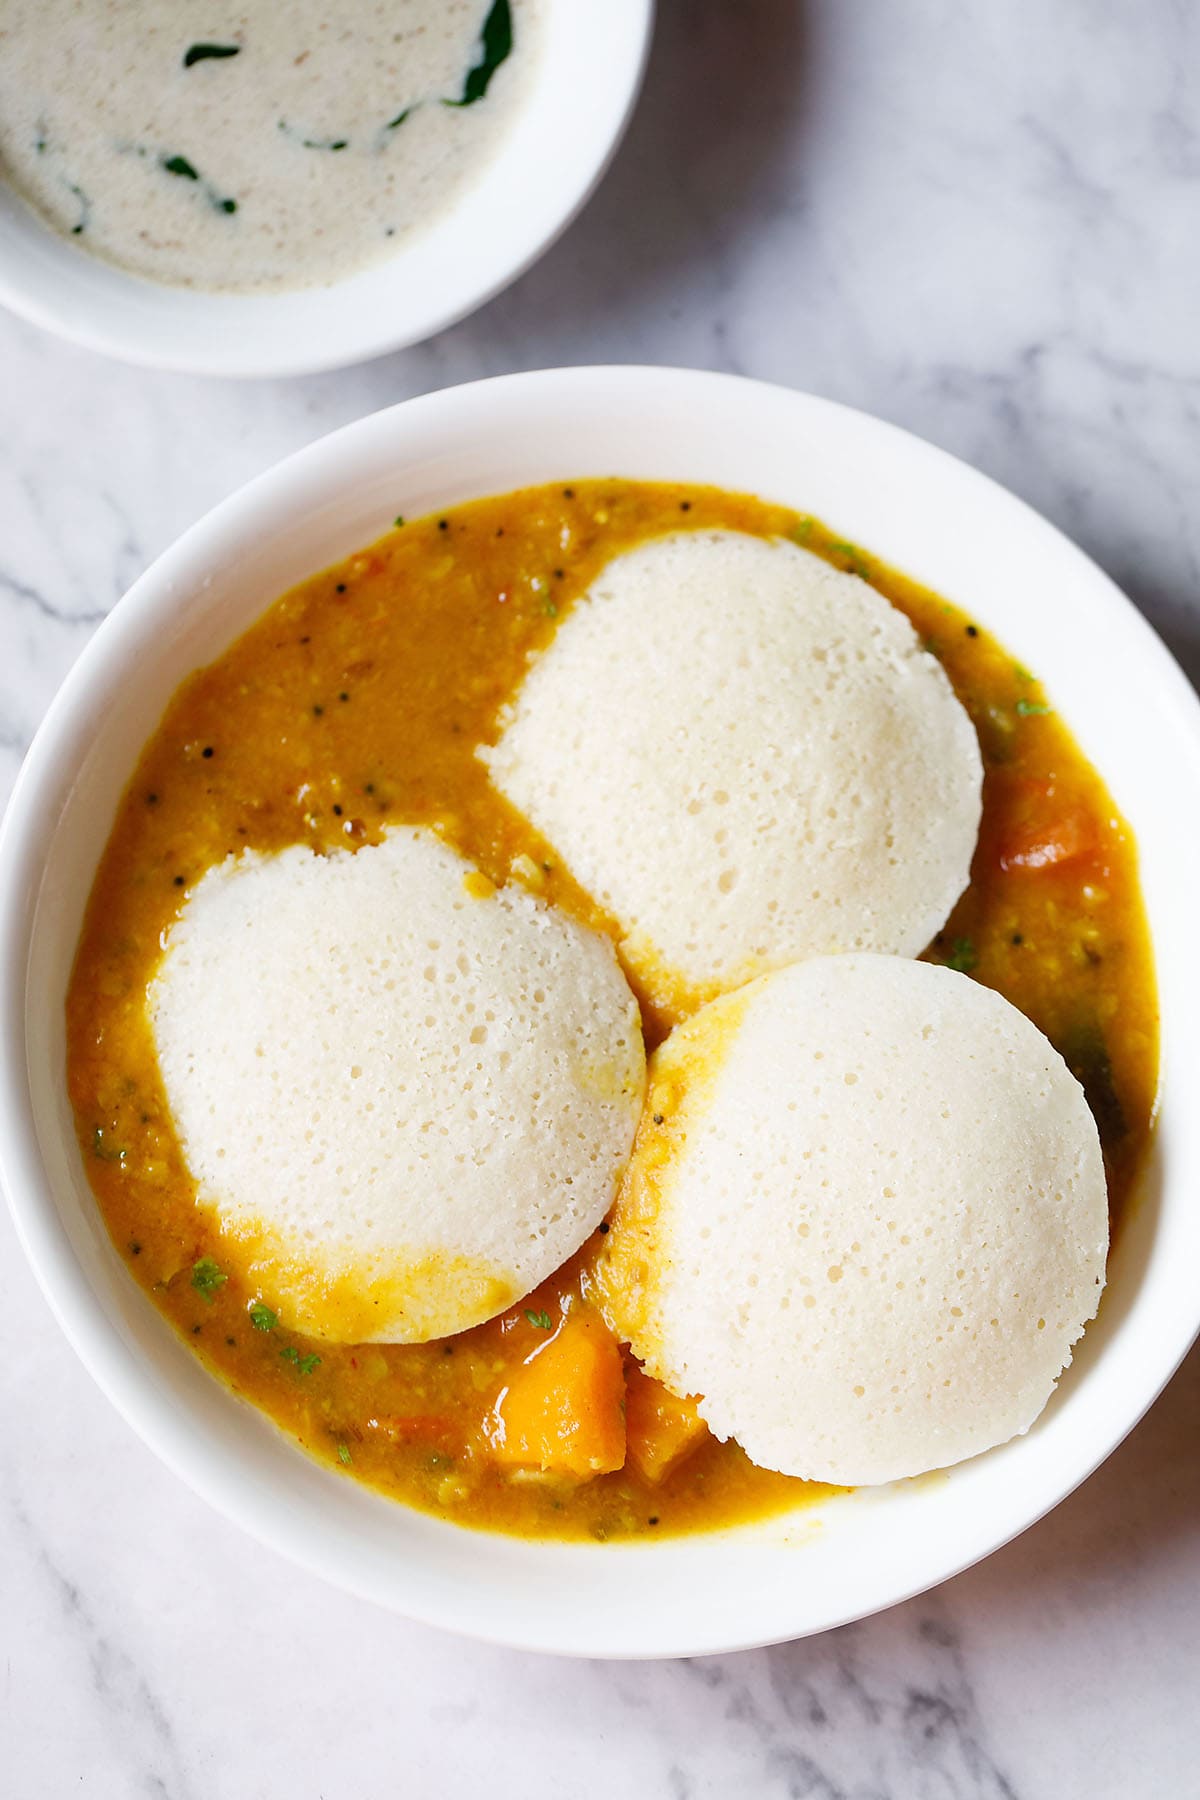
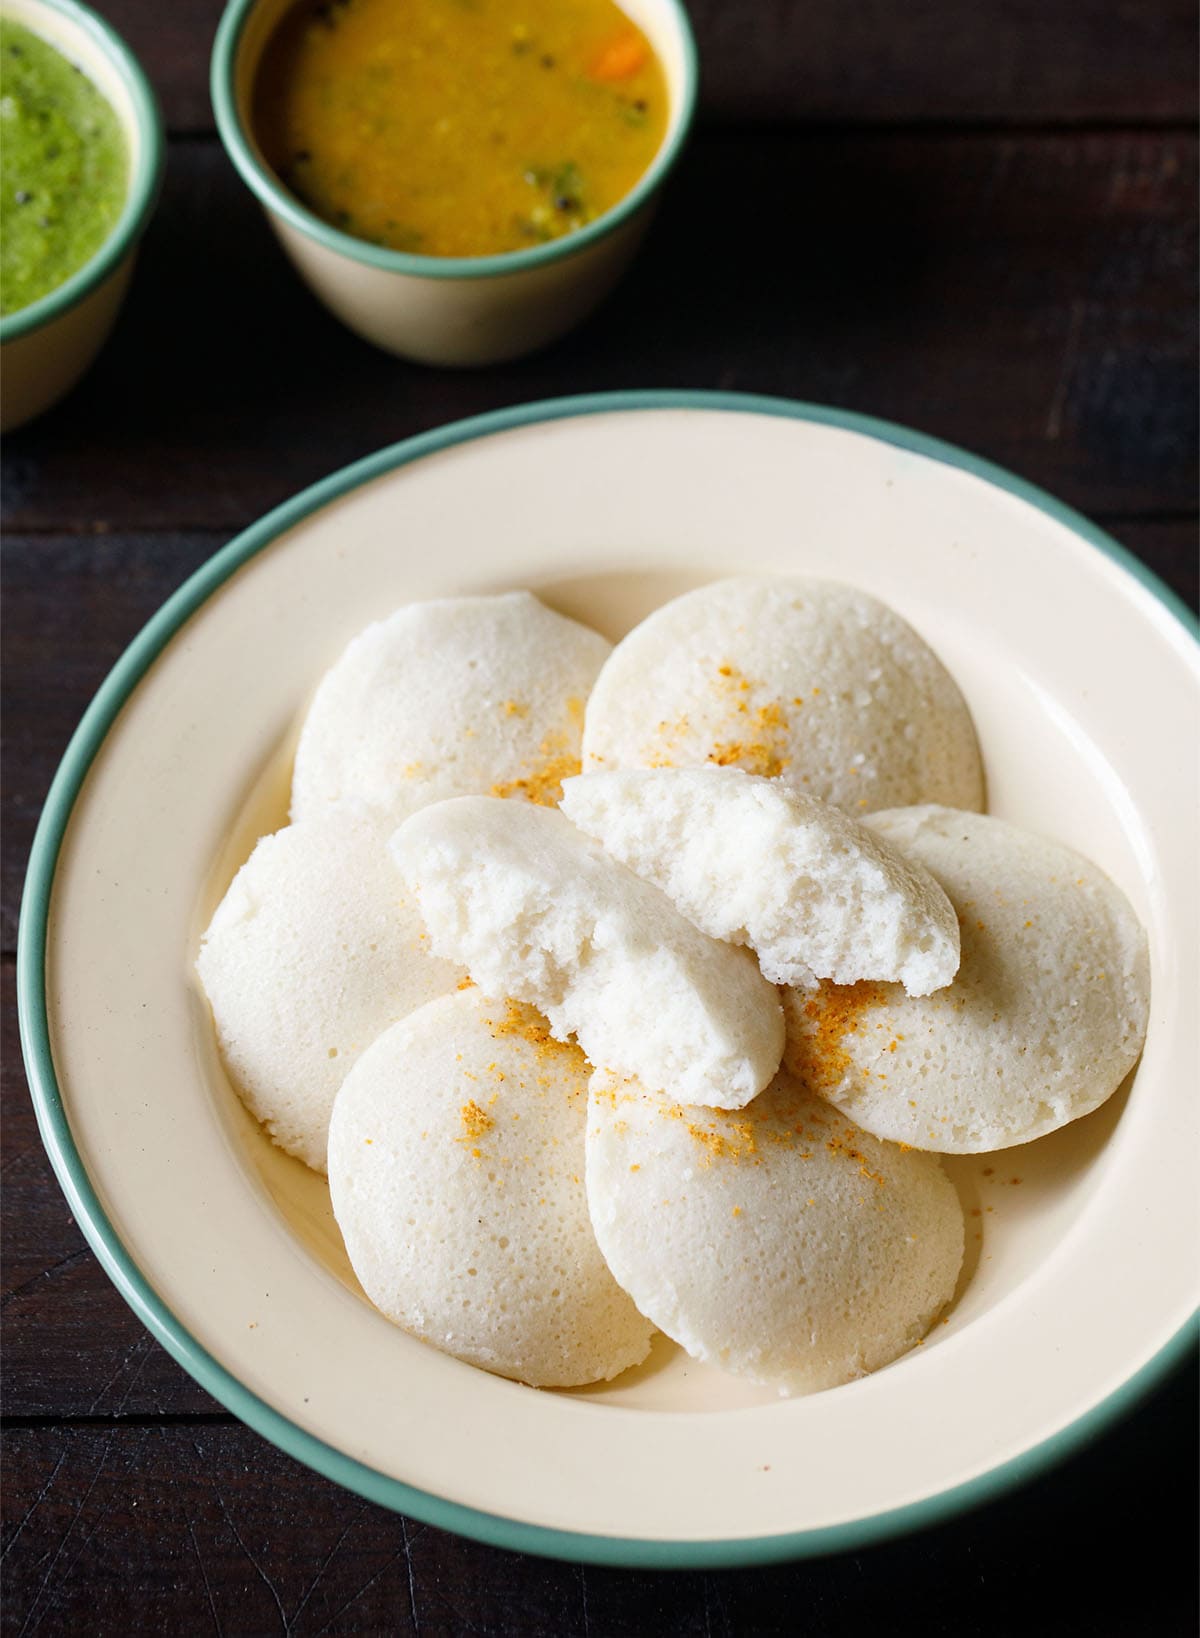
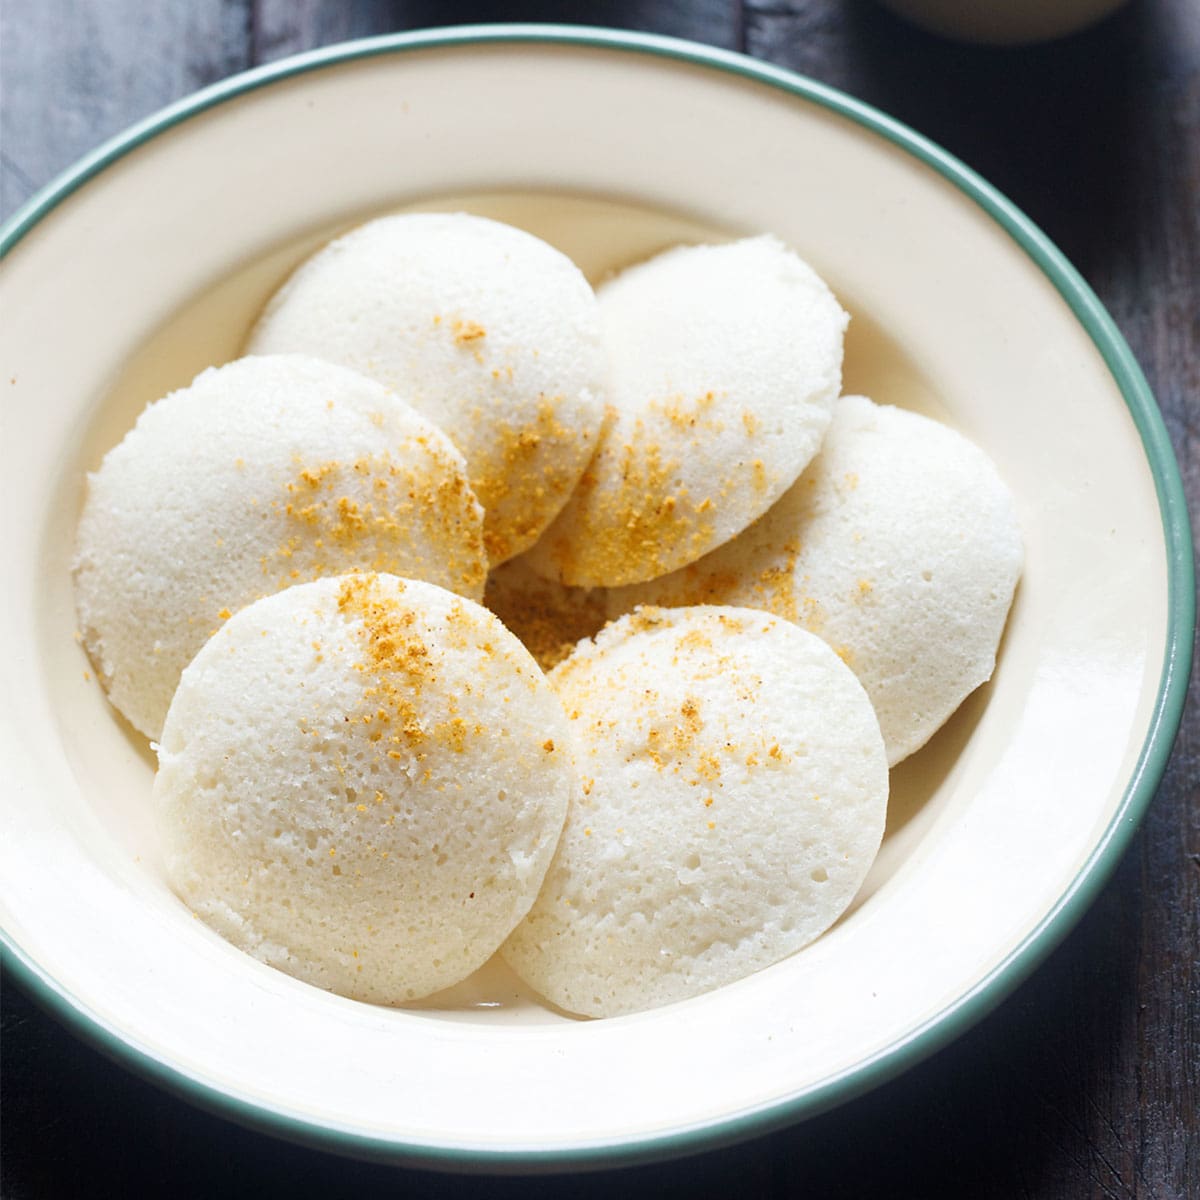
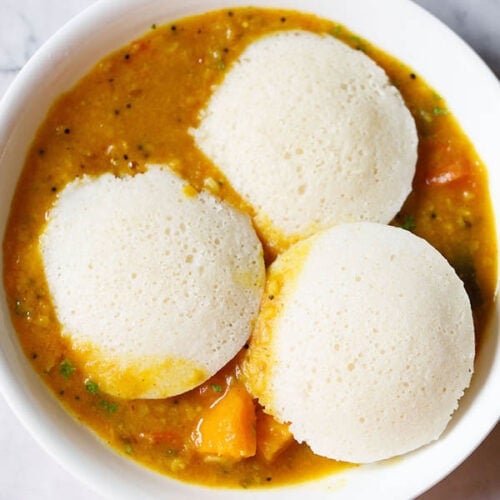
22. Serve Idli hot or warm with sambar and coconut chutney.
What to Pair With Idli
- Idli is most commonly served with coconut chutney and sambar, a classic pairing that brings out its soft, delicate flavor. Traditionally, idli is dunked in hot sambar and eaten with generous spoonfuls of chutney on the side.
- There are many variations of both sambar and chutney you can try; from thick hotel-style Tiffin Sambar to thinner, homestyle versions.
- You can also serve idli with chutneys like Onion Chutney, Tomato Chutney, or Peanut Chutney for variety.
- Another delicious and quick accompaniment is Idli Podi – a dry lentil-based spice mix often mixed with ghee or sesame oil.
- If you’re short on time, a simple plate of idli with coconut chutney and podi is just as satisfying. In some homes, idli is served with tempered and spiced curd, making for a comforting combination.
Storing Idli and Batter the Right Way
Leftover idlis can be stored in the refrigerator for up to 2 days. Place them in an airtight container and reheat by steaming or microwaving with a sprinkle of water to bring back their softness.
Idli batter keeps well in the fridge for 3 to 4 days. Store it in a covered container and bring it to room temperature before using. Stir the batter gently before making idlis, as this helps retain the air bubbles formed during fermentation.
If you’d like to store the batter longer, it can be frozen for up to 1 month. Use airtight, freezer-safe containers and leave some space for the batter to expand.
Thaw the batter overnight in the fridge or at room temperature before use. Keep in mind that frozen batter may yield slightly less airy idlis compared to freshly fermented batter.
Creative Variations You Can Try With the Batter
Once you master the basic idli batter, there are endless ways to make it your own. You can add lentils like moong dal to create Moong Dal Idli, or blend in millets and millet flours for a more wholesome twist. I also include thick poha to make the incredibly soft and fluffy Poha Idli.
If you’re looking for healthier or gluten-free options, adding millets like ragi (check my Ragi Idli) or other millets works very well.
Even oats can be included in the batter for added fiber. I’ve shared an Quick Oats Idli recipe on the blog that’s perfect for busy mornings. You can also have a look at this Millet Idli made with foxtail millet for a light and nutritious option.
You may also enjoy exploring these unique regional and creative takes:
- Kanchipuram Idli – Spiced and steamed in banana leaves, this Tamil Nadu-style idli is flavored with cumin, pepper, ginger, and ghee.
- Thatte Idli – A large, flat idli from Karnataka that’s soft, spongy, and perfect for dunking in sambar.
- Leftover Rice Idli – A great way to use cooked rice, these idlis are soft, fluffy, and need fermentation.
- Sama Chawal Idli – Made with barnyard millet (sama), these idlis are ideal for fasting days or gluten-free diets.
- Kotte Kadubu – A traditional Karnataka recipe where idlis are steamed in jackfruit leaves for a distinct flavor and aroma.
Ultimately, don’t be afraid to experiment. Try different proportions, additions, and techniques to discover what gives you the best texture, taste, and fermentation in your own kitchen.
Expert Tips
Like I have mentioned above Idli was a weekend ritual growing up. Every Sunday meant hot idlis or soft dosas with chutney and sambar. When I first started making them myself, it took some trial and error, but I eventually learned what works.
- Adding Poha: Add a handful of thick poha or cooked rice to the batter for a softer texture. This step is optional but makes a noticeable difference.
- Steaming in Muslin: Opt to steam idlis on a damp muslin cloth for a smooth, soft surface.
- Fermentation: Ensure the batter ferments well, with a pleasant, mildly sour aroma and visible rise.
- Rice Type: Use idli rice or an equal mix of parboiled rice (idli rice) and raw rice for best results.
- Lentil Freshness: Always use fresh urad dal; aged lentils can lead to dense idlis.
- Water Proportion: The amount of water should be perfect in your batter. Neither less nor more. Aim for the correct balance.
- Multipurpose Batter: The batter is versatile – make idli on day one, and dosa, uttapam, or appe on the following day.
Fermentation Help – How to Fix Batter That Won’t Rise
Fermentation is a key factor in getting soft, light and fluffy idli. For proper fermentation of idli batter a warm temperature is apt. In cold climates, fermentation does not happen well.
I get a lot of queries on how to ferment idli or dosa batter in winters. So I have summarized my experiences in the following points below:
- Keep the batter warm: Fermentation needs warmth. In winter or cold climates, place the batter near a heater, in a switched-off oven preheated slightly, or inside an Instant Pot using the yogurt mode on the ‘less’ setting.
- Avoid salt during fermentation in winter: Salt slows down fermentation, especially in colder temperatures. Add it only after the batter has risen.
- Add a pinch of sugar or use fenugreek seeds: Sugar helps kickstart fermentation. Soaking fenugreek seeds with urad dal helps the batter ferment better and faster by boosting the natural good bacteria and yeast, which also makes the batter rise well and gives it a better texture.
- If the batter hasn’t risen at all: After 12 to 14 hours, if there’s no rise and it’s still cold, stir in ¼ to ½ teaspoon of instant yeast dissolved in a bit of water. Use the batter immediately and don’t refrigerate it, as it will become too sour.
- As a last resort, add baking soda: A small amount (¼ to ½ teaspoon) of baking soda can be added before steaming, but use this only if fermentation completely fails.
- Check your urad dal batter: The urad dal must be ground until very fluffy and light. This helps the entire batter rise better.
- Water ratio matters: Don’t use too little water, as it can lead to a thick, dense batter that doesn’t ferment properly.
- Use an Instant Pot in very cold climates: Place a small trivet in the Instant Pot steel insert, set the batter bowl on it, and ferment using the yogurt setting. Keep the vent on venting or use a glass lid. In warm weather, this may take 7 to 8 hours; in winter, it can take longer.
Idli Batter vs Dosa Batter – What’s the Difference?
Though both are made from the same ingredients, idli and dosa batters have key differences. Idli batter is thicker in consistency and needs to hold its shape when poured into moulds.
Dosa batter, on the other hand, should be slightly thinner so it spreads easily on a hot tawa/griddle. For idli, I usually follow a 4:1 ratio of rice to urad dal. For dosa, a 3:1 ratio works well.
Interestingly, you can use the same 4:1 idli batter to make dosa; just thin it slightly with water after fermentation.
This versatility is what makes the idli-dosa batter a true staple in South Indian kitchens. You can also swap in sona masuri or parmal rice for dosa, or even use idli rava instead of rice.
Leftover idlis are perfect for quick snacks or lunchbox recipes. Here are some creative and tasty ways to use them:
- Fried Idli: Shallow-fry or deep-fry leftover idlis until golden and crisp. Serve with chutney or ketchup for a crunchy snack.
- Masala Idli: Cube the idlis and sauté them in a spicy onion-tomato masala with curry leaves and spices.
- Idli Upma: Crumble the idlis and sauté with mustard seeds, green chilies, curry leaves, and onions for a quick and satisfying dish.
- Chilli Idli: Stir-fry cubed idlis with capsicum, onion, soy sauce, and green chilies for a desi-Chinese twist.
- Podi Idli: Toss warm idlis in a mixture of idli podi and sesame oil or ghee for a spicy, flavorful snack.
- Idli Manchurian: Pan-fry idli pieces and coat them in a sweet, tangy Manchurian sauce – perfect as an Indo-Chinese appetizer.
Your Idli Questions Answered
Well-fermented idli batter should double in volume, have a mild sour aroma, and show small air bubbles throughout. It will feel lighter when stirred and look slightly risen and airy on top.
This usually happens when the urad dal isn’t ground fluffy enough or the batter is too thick. Make sure you grind the urad dal till very light and airy. Also, don’t skimp on soaking time or warmth during fermentation.
Yes, you can make idli without poha (flattened rice). However, poha or a bit of cooked rice helps in giving the idlis a more softer texture. If you skip it, make sure your fermentation is strong and batter consistency is perfect.
If the batter hasn’t fermented after 12 to 14 hours, and the temperature is cold, you can stir in a small amount of instant yeast or baking soda just before steaming. But only do this if absolutely necessary, and use the batter immediately.
If you’ve tried this recipe, please rate it in the recipe card or leave a comment below – I’d love to hear your feedback. For more vegetarian inspiration, sign up for my email updates or follow me on Instagram, Youtube, Facebook, Pinterest or X.
Idli Recipe (Traditional South Indian)
Idli is a classic South Indian breakfast dish prepared from a fermented batter of parboiled rice and urad dal (hulled black gram), steamed into soft, airy, and spongy cakes. It is commonly enjoyed with coconut chutney and sambar, making for a nutritious and satisfying meal. Idli is a popular Indian breakfast which is filling as well as nutritious.
Prep Time 9 hours
Cook Time 25 minutes
Total Time 9 hours 25 minutes
Prevent your screen from going dark while making the recipe
Soaking rice and lentils
Pick and rinse both the regular rice and parboiled rice.
Rinse the poha and add to the rice.
Add water. Mix well. Cover and keep the rice + poha to soak for 4 to 5 hours.
In a separate bowl, rinse the urad dal and methi seeds a couple of times.
Soak the urad dal with methi seeds separately in water for 4 to 5 hours.
Making idli batter
Drain the soaked urad dal. Reserve the water.
Grind the urad dal, methi seed with ¼ cup of the reserved water for some seconds. Then add remaining ¼ cup water. Grind till you get a smooth and fluffy batter.
Remove the urad dal batter in a bowl and keep aside.
Grind the rice in batches to make a smooth batter.
Mix both the batters together in a large bowl or pan. Add salt and mix well.
Cover and let the batter ferment for 8 to 9 hours or more if required.
After the fermentation process is over, the idli batter will become double in size and rise.
Making idli
Grease or brush the idli moulds evenly with oil.
Pour the batter in the moulds and steam the idli in a pressure cooker or steamer.
If using pressure cooker remove the vent weight (whistle).
Steam for 12 to 15 mins or until the idli is done.
Serve the steaming hot idli with coconut chutney and sambar.
Remaining batter can be stored in the refrigerator for a couple of days.
- For regular rice variety – you can use sona masuri rice or parmal rice or basmati rice.
- Note that the approximate nutrition info is for 1 medium-sized idli served as is without chutney or sambar.
-
Fermentation is one of the main factors to get soft, light and fluffy idli. Fermentations tips for winters listed below.
- Warmth: Place the idli batter bowl in a warm place – e.g near a heater or in a warm place in your kitchen.
- Oven: Preheat your oven at a low temperature (80 to 90 degrees celsius) for about 10 to 15 minutes. Then switch off the oven, keep the batter bowl inside and close the door.
- Lights in the oven: If your oven has lights, then keep the lights on and place the batter inside.
- Sugar: Adding a bit of sugar does help in fermenting the batter. In this recipe you can easily add upto 1 teaspoon sugar and don’t worry – the idli won’t be sweet.
- Salt: During winters, skip adding salt to the idly batter as salt retards the fermentation process. Rock salt and sea salt are good options to add in the idli batter.
- Fermentation time in cold winters: In winters, keep the batter for a longer time to ferment, like 14 to 24 hours or more. Do remember that even if you do not see the batter doubled or tripled, you should see tiny bubbles in the batter. You should also get the typical faint sour fermented aroma from the idli batter.
- Instant Yeast: You can even add ¼ to ½ tsp of instant yeast (dissolved in 2 to 3 teaspoons of water) 30 to 45 minutes before you steam the idli. But do this method when the batter has not fermented well. The negatives of this method is that you have to use all the batter at once. Even refrigerating this batter makes it very yeasty and sour.
- Baking Soda: You can also add ¼ to ½ baking soda and then ferment the batter in cold seasons.
- Fenugreek seeds: Addition of fenugreek seeds (methi seeds) also helps in fermentation.
- Urad dal batter consistency: Urad dal has to be ground really well. Urad dal batter has to be soft, light and fluffy. So I suggest to grind both urad dal and rice separately to get soft and fluffy idli. A well ground urad dal batter also helps in fermentation. Also use urad dal which is fresh and within its shelf-life. Aged urad dal does not ferment well and makes the idli dense.
- Amount of water: Do remember to add the right amount of water in the batter. If the water is less, then the idli will become dense.
- Fermenting idli batter in Instant Pot: Press the yogurt option and use the less mode. Place a small trivet in the IP steel insert. Keep the bowl with the batter on the trivet. Keep the vent position to venting or you can use the Instant Pot glass lid. Set the time for 7 to 8 hours. On warmer days, the batter will ferment quickly. On colder days, it may take a few more hours for the batter to ferment in the Instant Pot.
Nutrition Facts
Idli Recipe (Traditional South Indian)
Amount Per Serving
Calories 38 Calories from Fat 9
% Daily Value*
Fat 1g2%
Saturated Fat 1g6%
Sodium 81mg4%
Potassium 9mg0%
Carbohydrates 8g3%
Fiber 1g4%
Sugar 1g1%
Protein 1g2%
Vitamin B1 (Thiamine) 1mg67%
Vitamin B2 (Riboflavin) 1mg59%
Vitamin B3 (Niacin) 1mg5%
Vitamin B6 1mg50%
Vitamin C 1mg1%
Vitamin E 1mg7%
Calcium 5mg1%
Vitamin B9 (Folate) 1µg0%
Iron 1mg6%
Magnesium 2mg1%
Phosphorus 9mg1%
Zinc 1mg7%
* Percent Daily Values are based on a 2000 calorie diet.
Idli Recipe from the archives was first published on April 2012.

Source link